Author: DAHENG IMAGING Date: 2021-11-22
Industry: Automobile Manufacturing
Project: Power battery busbar welding quality inspection
Background
With the promotion of energy conservation and emission reduction, the demand of electric vehicles is increasing year by year. As an important part of electric vehicles, the quality of power batteries directly affects the operational safety of electric vehicles. Therefore, quality inspection of power batteries plays a critical role in the vehicle manufacturing process.
Act as a key part of the power battery, the quality inspection of the busbar is mainly refer to the weld length and height, whether there are fracture welds, welds deviation, through hole or dents, and whether the gap between the busbar and the electrode column is up to the standard, etc.
Requirements
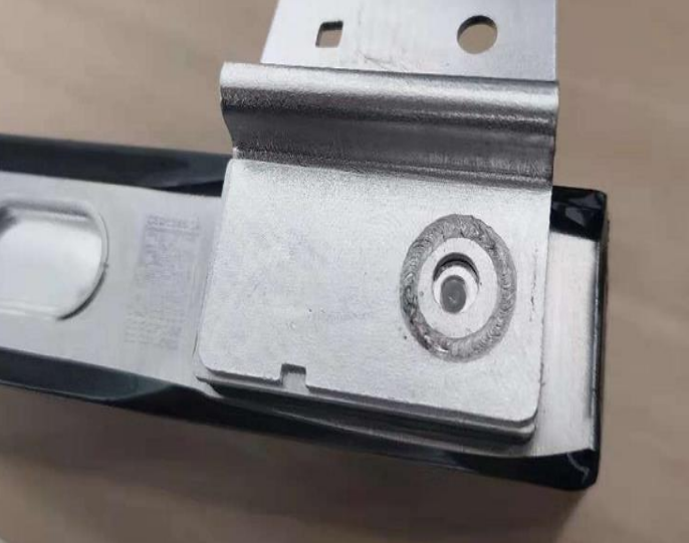
Busbar
The busbar welding quality in the square aluminum housing power battery module is tested. Test items and test requirements are as follows:
Quality monitoring items | Features | Standards | Accuracy |
Fracture & incomplete welds | Existence of fracture welds | Fracture length≤1.0mm | 0.2mm |
Length of weld | The length does not match the specified value | Difference between actual value and theoretical value≤0.5mm | 0.2mm |
Width of weld | The width does not match the specified value | Difference between actual value and theoretical value≤0.5mm | 0.2mm |
Surplus height of weld | The height does not match the specified value | Difference between actual value and theoretical value≤0.5mm | 0.05mm |
Weld deviation | The position of the weld deviates from the specified position | Left/right deviation≤0.5mm Upper/lower deviation≤0.5mm | 0.2mm |
Through hole | Through holes in the weld seam | Area of the hole≤2.0mm2 Exceeded value of the hole’s depth≤0.3mm | 0.3mm |
Dents | Dents in the weld seam | Area of dents≤2.0mm2 The depth of the hole exceeds the theoretical value≤0.6mm | 0.06mm |
Gap | The gap between the busbar and the electrode column | Difference between actual value and theoretical value≤0.5mm | 0.05mm |
Solution
A 2D camera and a 3D camera are selected to cooperate with the power battery busbar welding quality inspection system for measurement. 2D camera for detecting fracture welds, width of welds, and incomplete welds. The 3D camera performs height term detection by getting height information from the measured object. The 2D camera is equipped with a light source and lens, which perpendicular to product installation in order to take pictures. The 2D camera takes one shot at each side of the left and right weld seams, while the 3D camera needs to scan the entire weld surface during the motion.

System diagram
Presentation
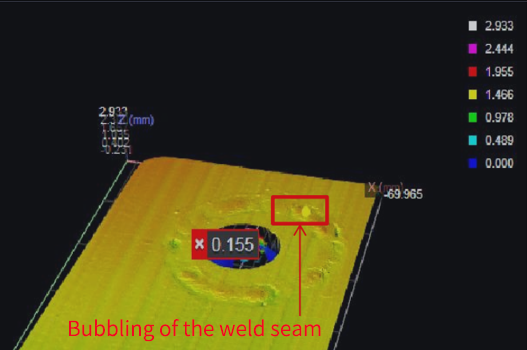
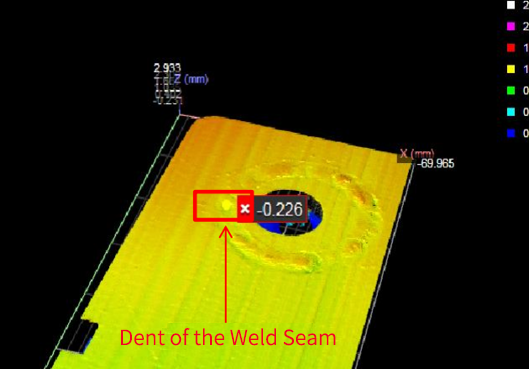
3D images
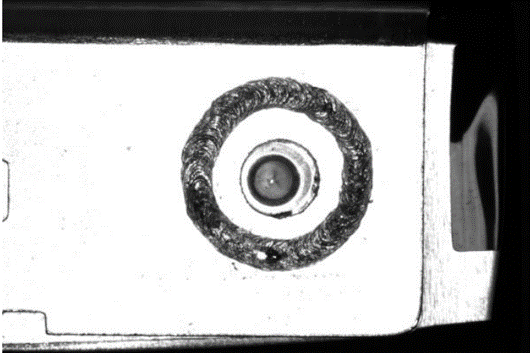
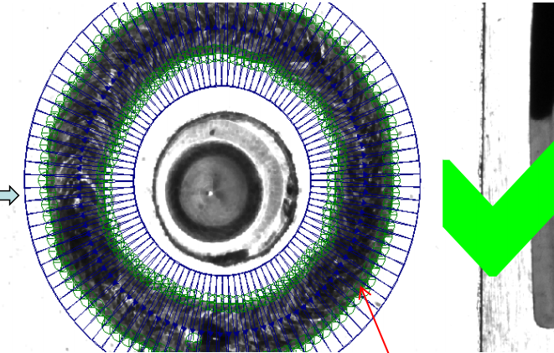
2D images
Related products
 |  |
Address:12F Daheng Science & Technology Tower, No.3 Suzhou Str., Haidian District, Beijing China
E-mail:isales@daheng-imaging.com